For my first project, I decided to work on what I feel most at home with, the French Horn. I have been playing French horn for 26 years, on and off, repairing for at least 20 of those years. I do work professionally at a small repair shop in the middle of New Jersey. Restorations are not something we do commonly. We do not have the room nor all of the tools to do so. Because of this, I have to make do with the tools that I have in the shop. Sometimes, I even have to consider making my own tools for such jobs.
My younger sister is a private music teacher with 20 years of one-on-one teaching experience. She is quite talented. The only problem is that French horns are expensive. (We’re talking hundreds for even a cheap model.) She usually ends up stealing mine. This causes problems when I need to go to orchestra rehearsal. I have to drive almost an hour to her house to take my horn back. Then, I go to rehearsal and not practice much during the week.
Just a little while ago, this poor, trashed, abused 1970 Conn French horn fell into my lap. Looking at it, I thought, maybe this poor thing is exactly what I need to solve my dilemma! With that being said, I took it to my shop to take a better look at it.
The Roast
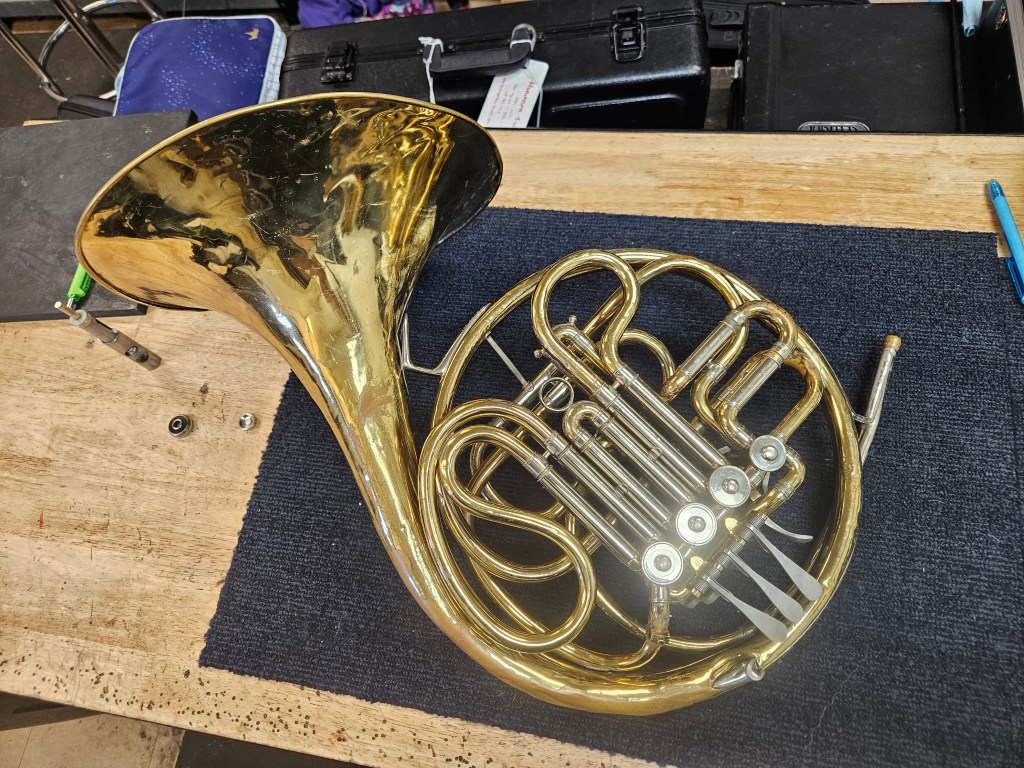
This poor baby has truly seen better days. The bell is beyond not round like it should be. There are a massive amount of dents all over the horn. The worst of them is in the disastrous 2nd branch. It is missing at least one brace that is unsoldered in various areas. Also, the Bb slide 3rd rotor tuning slide is missing. The mouth pipe (Often mislabeled as the lead pipe) is also bent at a 45-degree angle. Any band instrument technician with even half a brain cell would deem this horn as “unplayable”.
There’s no way to put it nicely but this horn was seriously abused by some jerk of a kid who believes that money grows on trees and either the school has millions in the budget for repairs, or repairs like this don’t cost that much.
The good thing, however, is that the Valve Cluster (The section with the rotors and keys) is perfectly fine! This is the one area which is the biggest pain in the rear end to fix. So, we’re off to a decent start. The rotors work and there are no dings in the casing or in the outer slides of the main
Beginning the Restoration
Before explaining anything, I must make a disclaimer:
I am a professional Band Instrument Repair Technician. Do not try this at home. Consult your preferred Repair Tech before attempting .
The first thing I did was try to make the rim of the bell as close to a circle as I could. This also meant taking a few of the dents in the bell out. I had to use a variety of methods, but after an hour or so, I managed to get it close to resembling a what a French horn bell should look like. I did this to make sure that it fit into my chemical dip tank.
To prep the horn for the dip, I had to remove the slides and rotors. I did a quick scrub down with soap and water to get rid of the dust and dirt on the outside of the horn. I use the blue Scotch Brite pads to help me wash off the surface dirt. I also ran what’s called “a snake” through the horn. This snake has soft bristles on a flexible tube which allows it to go through the curves of the horn. Once it gets a quick scrub down, I placed it into the chemical bath.
The chemical that I use is a product called Slime Away. It comes in a concentrated crystal form which you add water to. It becomes a very acidic liquid which helps to dissolve the gunk that is inside the horn. I leave the horn in the chemical bath for 5 minutes. This allows a large amount of the mold, dirt, and other unpleasant things that are lurking in the instrument to either dissolve or become loose enough to come out with either a water rinse or another scrub with soap and water. Any longer than 5 minutes and the horn’s lacquer and plating will come off.
Once the chemical bath is completed, I immediately run water through the horn to flush out any debris that loosened up during the soak. If anyone remembers 9th grade science, to neutralize an acid, a base must be added. In this case, I use a mild dish soap (I prefer Dawn) to wash away the acid. This means yet another but more thorough wash must be done. I, once again, turn to my trusty Scotch Brite blue pad to scrub the outside of the horn. When it comes to the slides, I use a green Scotch Brite pad to clean the inner slide (Yes, there is a MAJOR difference between the blue and green pads). I also snake out the insides to neutralize the acid.
My last step is to do a major scrub of the Valve cluster. I use my beloved Dremel with its round brush to help to do a deep clean, making sure that there is absolutely nothing in the valve casings.
My last step of the day is I use a shop vac to shoot out air to blow off any water on or inside the horn. I lay each piece on a towel and leave it out to dry overnight. If there is one thing that French Horn players complain about with their instrument, it’s finding ALL of the “spit” that is in the horn, even after twirling it like a flag twirler in the color guard (just need to learn how to toss it and catch it), spit will still be in that one place that you cannot get to. For this reason, I like to leave it out for a day or two, completely disassembled to give nature a fair chance to evaporate ANY remaining water.

Reflection
This project is not going to be an easy project to do. This horn will require LOTS of time, patience, and money. You can also expect cuts, burns, and even screaming. All of this is necessary to get this horn into a playable condition. However, the reward for doing so is going to be worth it. This is not just any French Horn that my sister’s getting. It’s one that I’m pouring my heart, soul, and love into. It’s a labor of love so this horn will be loved for the rest of my sister’s life.
All of this took me approximately 2 hours of work. So, it will be interesting to see how much time it will take to get this horn into working condition. I will keep a running total of hours as well as the cost. It’s time to stop for the day and tomorrow’s another day.


Leave a comment